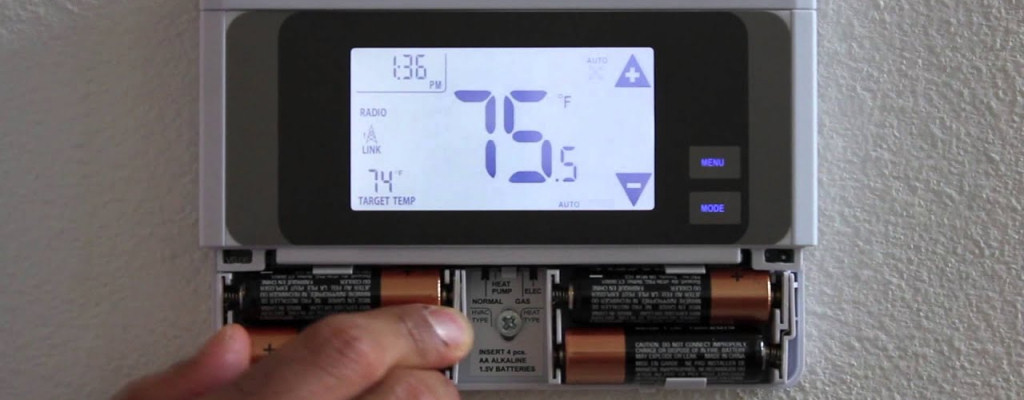
We don’t have to tell you that the weather here in Northeast Ohio is still frigid. How’s your thermostat doing? Did you just notice a low battery warning on it? You might not be aware that many digital and smart thermostats use batteries, while others are powered by your home’s electrical or HVAC system.
It’s wise to replace your thermostat’s batteries on a set date every year. The start of spring or autumn is an excellent choice. Take the opportunity to replace the batteries in your carbon monoxide (CO) detectors then as well. We’ll show you how easy it is to change your thermostat’s batteries.
How do I know when my batteries are low or dead?
Fortunately, your thermostat tells you when its batteries are about to die, and it’s time for some new ones. Almost all programmable units have a low battery indicator, and it’ll display around a month or two before the battery runs out completely. This warning might be a flashing light, a battery icon, or a text notice – what matters is that you don’t ignore it.
Most of us procrastinate. It’s human nature. While your thermostat provides you with ample warning before its batteries die, if you wait long enough, you’ll know the batteries are totally spent when your thermostat’s screen is blank.
What type of batteries do I need?
Your thermostat most likely requires AA or AAA alkaline batteries, a 9-volt battery, or less often, a button-style 3V lithium battery. Check your owner’s manual for the correct batteries, and if you need a button battery, carefully note the size. It’s wise to keep spare batteries on hand, saving you an inconvenient trip to the store.
Even if your thermostat has a constant electrical connection, it probably has a backup battery that should be changed annually. This backup battery enables your system to continue working even if your home loses power.
How to change your thermostat’s batteries
1. Gather useful items, such as a flashlight and a flat-blade screwdriver.
2. Remove the thermostat’s outer cover. If your unit doesn’t have a cover, gently push the thermostat itself up and off its wall mount plate.
3. Turn the thermostat (or cover) over to see the battery location. Remove the dead batteries. You may need to use a flat-blade screwdriver to dislodge the batteries and then lift them carefully with your fingers.
4. After the old batteries are out, inspect the metal spring terminals. If you see acid residue, it’s a smart move to replace the thermostat with a new unit.
5. Insert the new batteries by matching the positive (+) and negative (-) signs on the thermostat with those on the battery itself.
6. After replacing the batteries, ensure the thermostat or cover is reattached to its wall plate. The metal posts should be properly aligned with the terminal screw block. Gently press the unit until it clicks into place.
Is my thermostat failing?
Even a very old thermostat may continue to function for many years. However, if your device isn’t working well, or you’re frequently replacing its batteries, you should replace it right away. Here are several indications that your thermostat isn’t operating as it should.
1. Your HVAC system won’t turn on.
2. Your furnace or air conditioner doesn’t respond to changes made at the thermostat.
3. Your HVAC system is short-cycling – that is, turning on and off much more frequently than expected and only running for a short time while it’s on.
4. Your thermostat keeps losing its programmed settings.
We have your thermostat needs covered
If you think your old thermostat needs replaced or you have a heating or cooling system issue, call our heating and air conditioning experts at Hey Neighbor Heating & Cooling. Our team of neighborly technicians is trained on all components of a properly-functioning HVAC system – including all types of thermostats. So, for all of your heating and air conditioning repair needs, call us at 844-HEY-NEIGHBOR or schedule service online today!


Comments are closed